
Tile Grout
Tile grout may not be the first thing that comes to mind when planning a tiling project, but it is an essential component that ensures your tiles are properly secured, protected, and aesthetically pleasing. With a wide range of grout types available, choosing the right one for your project is key to achieving long-lasting results.















What is Tile Grout?
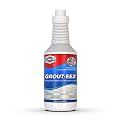
Tile grout is a dense, cement-based paste used to fill the gaps or joints between tiles once they are installed. It is an essential component of the tiling process, providing both structural integrity and aesthetic appeal. Grout helps to keep tiles securely in place while preventing dirt, moisture, and debris from accumulating between them. Additionally, grout serves as a sealant to ensure that water does not seep behind the tiles, which could lead to issues such as mold, mildew, and water damage.
Why Is Tile Grout Important?
While tiles themselves are the stars of any tiled surface, grout plays a key supporting role. Here are a few reasons why tile grout is so important:
- Structural Integrity: Grout keeps tiles securely in place and prevents them from shifting or becoming loose over time.
- Water Resistance: When applied correctly, grout helps to prevent moisture from seeping into the spaces between tiles, which could lead to damage or mold growth.
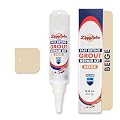
- Aesthetic Appeal: Grout comes in a variety of colors, allowing you to choose the perfect hue to complement the tiles and the overall aesthetic of the space.
- Easy Maintenance: Properly applied grout makes it easier to clean the tiled surface and ensures that dirt and debris don’t accumulate in the joints.
Types of Tile Grout
When it comes to selecting the right grout for your project, understanding the different types available is key. Each type of grout has its own unique characteristics, making it suitable for specific applications. Here are the main types of tile grout:
1. Cementitious Grout
Cementitious grout is the most commonly used grout for tile installations. It is composed of a mixture of cement, sand, and water, making it a versatile and affordable choice. Cementitious grout comes in two main subtypes: non-modified and modified.
- Non-Modified Cementitious Grout: This type of grout does not contain any additives and is typically used for standard tile installations where moisture resistance and strength are required. Non-modified grout is best for interior applications, such as flooring and walls in dry areas.
- Modified Cementitious Grout: Modified grout includes additional ingredients such as polymers or latex to enhance its strength, flexibility, and water resistance. This type of grout is ideal for wet areas, including showers, bathrooms, and kitchens, where enhanced moisture protection is needed.
Pros of Cementitious Grout:
- Widely available and affordable
- Easy to mix and apply
- Versatile for various tile materials and sizes
- Provides a smooth, clean finish
Cons of Cementitious Grout:
- Requires sealing to prevent staining and moisture infiltration
- Can crack over time if not applied properly
2. Epoxy Grout
Epoxy grout is a highly durable and stain-resistant grout made from a two-part resin and hardener mixture. Unlike cementitious grout, epoxy grout does not require sealing and is naturally resistant to moisture, stains, and chemicals. This makes epoxy grout an excellent choice for areas prone to heavy moisture, such as bathrooms, kitchens, and commercial spaces.
Pros of Epoxy Grout:
- Resistant to stains, moisture, and chemicals
- Does not require sealing
- Highly durable and long-lasting
- Ideal for areas exposed to heavy traffic and harsh conditions
Cons of Epoxy Grout:
- More difficult to apply than cementitious grout
- Requires a faster application time before the grout sets
- More expensive than cementitious grout
3. Furan Grout
Furan grout is a specialized type of grout made from a combination of alcohol-based resins and hardeners. It is known for its superior resistance to chemicals, heat, and stains, making it a popular choice for industrial or commercial settings that require high levels of protection against harsh substances.
Pros of Furan Grout:
- Excellent chemical resistance
- Extremely durable and long-lasting
- Ideal for high-traffic areas and harsh environments
Cons of Furan Grout:
- Difficult to apply and requires professional expertise
- Expensive compared to other grout types
4. Unsanded Grout
Unsanded grout is a type of grout that does not contain sand particles. It is typically used for tile installations with narrow grout lines (less than 1/8 inch wide). Unsanded grout is often preferred for delicate tiles, such as glass, polished stone, or ceramic, as it is less likely to scratch the surface of the tile.
Pros of Unsanded Grout:
- Ideal for narrow grout joints
- Provides a smooth, fine finish
- Less likely to scratch delicate tiles
Cons of Unsanded Grout:
- Not suitable for wider grout joints
- Less durable than sanded grout for larger joints
5. Sanded Grout
Sanded grout is made with added sand particles, which give it a coarse texture. It is best used for wider grout joints (greater than 1/8 inch) and is typically applied in areas that experience heavy foot traffic, such as floors or outdoor installations. Sanded grout is stronger and more durable than unsanded grout, making it the ideal choice for larger spaces.
Pros of Sanded Grout:
- Strong and durable
- Ideal for wider grout joints
- Provides a textured finish
Cons of Sanded Grout:
- Can scratch delicate tiles
- Requires more careful cleaning to avoid scratching
How to Choose the Right Tile Grout
Choosing the right tile grout for your project depends on several factors, including the type of tiles, the width of the grout joints, the location of the installation, and your personal preferences. Here’s how to choose the best grout for your specific needs:
1. Tile Type and Size
The type of tile you're using plays a significant role in determining the type of grout you need. For example, glass or polished stone tiles should be paired with unsanded grout to avoid scratching the surface. On the other hand, larger tiles or tiles with wide grout joints require sanded grout for added strength and durability.
2. Grout Joint Width
Grout joints come in different widths, and the width of the gap between your tiles will determine the type of grout that is most suitable. Narrow grout lines (less than 1/8 inch) are best suited for unsanded grout, while wider joints (greater than 1/8 inch) require sanded grout for added strength and stability.
3. Location of Installation
The location of the installation is another key consideration. For areas that experience high moisture exposure, such as bathrooms and kitchens, it is recommended to use epoxy or modified cementitious grout, as these types are more resistant to moisture and stains. For high-traffic areas or industrial settings, furan grout may be the best option due to its superior resistance to chemicals and wear.
4. Ease of Application
Some grout types are easier to work with than others. For example, cementitious grout is relatively easy to mix and apply, making it ideal for DIY projects. On the other hand, epoxy and furan grouts require more skill and experience, so it may be best to hire a professional for these types of installations.
How to Apply Tile Grout
The application process for tile grout involves several key steps to ensure a smooth, even finish. Here's a general overview of the steps involved in applying grout:
Step 1: Preparation
Before applying grout, ensure that the tiles are clean and dry. Remove any spacers used during installation and inspect the grout joints for any debris or dust. It's also important to ensure that the tiles are firmly set in place and the adhesive has fully cured before grouting.
Step 2: Mix the Grout
Follow the manufacturer’s instructions to mix the grout. For cementitious grout, combine the grout powder with water, mixing until a thick paste forms. For epoxy or furan grouts, mix the resin and hardener according to the instructions provided.
Step 3: Apply the Grout
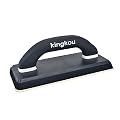
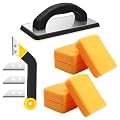
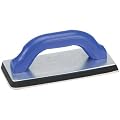
Using a rubber float, spread the grout across the tile surface at a 45-degree angle, ensuring that it fills all the grout joints. Press the grout firmly into the joints to remove any air bubbles and create a tight seal.
Step 4: Clean the Surface
After applying the grout, use a damp sponge to wipe off any excess grout from the tile surface. Be sure to clean the tiles carefully to avoid leaving grout residue behind. Allow the grout to set for about 15-30 minutes, then wipe the tiles again to ensure they are completely clean.
Step 5: Seal the Grout
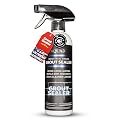
Once the grout has fully dried (usually 24-48 hours), apply a grout sealer to protect it from moisture and stains. This step is especially important for cementitious grout, which is porous and prone to staining.