
Flooring Adhesives & Mortars
Flooring adhesives and mortars are essential products that ensure the integrity and longevity of your flooring installations. Choosing the right adhesive or mortar for your specific project can be the difference between a flawless, long-lasting installation and one that fails prematurely.







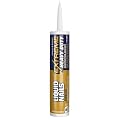

What Are Flooring Adhesives and Mortars?
Flooring adhesives and mortars are bonding agents used in the installation of various flooring materials, including tiles, vinyl, carpets, and more. These products hold the flooring in place, provide a stable base for walking or furniture placement, and contribute to the overall integrity of the floor system.
While both adhesives and mortars serve similar functions—providing an adhesive bond between the floor covering and the subfloor—they differ in terms of composition, application, and suitability for different flooring materials.
Flooring Adhesives
Flooring adhesives are specially formulated bonding agents designed for securing various types of floor coverings, such as carpets, vinyl sheets, and rubber flooring, to the subfloor. These adhesives can be either water-based, solvent-based, or polyurethane-based, and they come in various forms, including liquid, paste, or spray.
Mortars
Mortars, on the other hand, are thicker, cement-based materials typically used in the installation of tile floors, such as ceramic, porcelain, marble, or stone. Mortars are generally applied with a trowel and have superior bonding strength, providing a solid foundation for the tiles to stay in place. Mortars are often mixed with water to form a paste-like consistency that is easy to spread over the subfloor before placing tiles.
Types of Flooring Adhesives
Different flooring materials require different types of adhesives to ensure a secure bond. The three most common types of flooring adhesives are:
1. Water-Based Adhesives
Water-based adhesives are made with a water-soluble formula that makes them environmentally friendly and easy to clean. These adhesives are typically used for vinyl, carpet, and resilient floor coverings, offering excellent bonding strength without the need for harsh chemicals.
Pros:
- Easy to clean with water before setting
- Low odor and low VOC (Volatile Organic Compounds)
- Environmentally friendly
- Suitable for most residential applications
Cons:
- May not be as effective in high-traffic or commercial settings
- Requires a dry environment to cure properly
- May not adhere well to non-porous surfaces
2. Solvent-Based Adhesives
Solvent-based adhesives contain chemicals that provide a strong bond. These adhesives are designed for use in more demanding applications, such as heavy-duty commercial installations. Solvent-based adhesives are often used for products like rubber, vinyl, and linoleum flooring.
Pros:
- Strong bond for heavy-duty applications
- Works well in high-traffic and industrial environments
- Quick drying time
Cons:
- Strong odor, which may require proper ventilation
- Higher levels of VOCs, which can be harmful
- Requires solvents for cleanup
3. Polyurethane-Based Adhesives
Polyurethane adhesives are a more advanced, durable option that provides a strong bond for materials such as hardwood, laminate, and engineered wood flooring. These adhesives are moisture-resistant and work well in areas with fluctuating temperatures and humidity levels.
Pros:
- Highly durable and long-lasting bond
- Moisture and temperature resistant
- Works well on wood, laminate, and concrete floors
Cons:
- Requires longer curing times
- Can be more difficult to clean up
- More expensive than other types of adhesives
Types of Flooring Mortars
Flooring mortars are generally used for tiling projects, including ceramic, porcelain, stone, and marble tile installations. Mortars come in a variety of formulations, and choosing the right one is crucial for ensuring that your tiles adhere properly and remain in place for years to come.
1. Thinset Mortar
Thinset mortar is the most commonly used mortar for tile installations. It’s a cement-based compound designed for bonding tiles to subfloors and walls. Thinset mortar comes in both premixed and dry powder forms, allowing for flexibility depending on your needs.
Pros:
- Ideal for most tile applications
- Provides a strong, long-lasting bond
- Available in both ready-mixed and powder form
- Can be used for both wall and floor tile installations
Cons:
- Requires proper mixing if using powder form
- Needs to be applied within a short time after mixing
- Can take longer to cure than other adhesives
2. Epoxy Mortar
Epoxy mortar is a two-part system that consists of resin and hardener. It’s incredibly durable and resistant to water, stains, and chemicals. Epoxy mortar is ideal for areas exposed to heavy moisture, such as bathrooms, kitchens, and commercial spaces.
Pros:
- Highly durable and resistant to stains and moisture
- Quick curing time
- Strong bond for heavy-duty applications
Cons:
- Difficult to work with and requires careful mixing
- Expensive compared to other types of mortar
- Can be challenging to clean if it spills
3. Urethane Mortar
Urethane mortars are a flexible, high-performance option ideal for areas that require significant moisture resistance, such as bathrooms or kitchens. Urethane mortars offer superior bonding strength and can adapt to shifting and settling subfloors, making them an excellent choice for both residential and commercial tile installations.
Pros:
- Flexible, ideal for shifting subfloors
- Resistant to moisture, chemicals, and stains
- Can be used in high-traffic areas
Cons:
- Can be challenging to apply and requires expert knowledge
- Longer curing times
- More expensive than standard thinset mortars
How to Choose the Right Flooring Adhesive or Mortar
Choosing the right adhesive or mortar for your flooring project depends on several factors, including the type of flooring, the subfloor, and the environment where the flooring will be installed. Here are some key considerations to keep in mind:
1. Type of Flooring Material
Different flooring materials require different types of adhesives or mortars. For example, ceramic or porcelain tiles will need a cement-based mortar (like thinset), while vinyl or carpet flooring requires water-based adhesives. Make sure to choose an adhesive or mortar that is compatible with the material you are working with.
2. Environmental Conditions
Consider the environment where the flooring will be installed. For instance, areas exposed to moisture (such as bathrooms or kitchens) require adhesives and mortars that are resistant to water. In commercial or high-traffic areas, you may need adhesives or mortars that offer enhanced durability and resistance to wear and tear.
3. Subfloor Material
The material of the subfloor also plays a crucial role in determining which adhesive or mortar to use. For example, if you’re installing tile on a concrete subfloor, you’ll need a mortar that adheres well to concrete. If you're working with a wooden subfloor, an adhesive specifically designed for wood is required.
4. Curing Time
Different adhesives and mortars have different curing times. Be sure to factor in the required curing or drying time for the adhesive or mortar before proceeding with the next steps of your installation. Some products may require several hours to set, while others may need up to 24 hours or more.
How to Apply Flooring Adhesives & Mortars
Proper application of adhesives and mortars is essential to achieving a strong, durable bond. Here are the basic steps for applying these products:
1. Preparation
Start by preparing the subfloor. Make sure it’s clean, dry, and level before applying any adhesive or mortar. Any debris, dust, or moisture can interfere with the bonding process. For mortar applications, use a trowel to spread the product evenly across the subfloor, ensuring a uniform thickness.
2. Mixing (If Applicable)
For powdered adhesives and mortars, mix according to the manufacturer’s instructions. Ensure that you achieve the correct consistency to make it easy to spread across the surface.
3. Application
Apply the adhesive or mortar using a notched trowel for tile installations, or a roller or brush for vinyl or carpet adhesives. Spread the adhesive evenly, making sure to cover the surface without leaving any bare spots.
4. Installing the Flooring
Once the adhesive or mortar is applied, install your flooring material according to the product instructions. Be sure to press the tiles or other flooring materials into place firmly to ensure good contact with the adhesive or mortar.
5. Cleaning and Curing
After installation, clean any excess adhesive or mortar from the flooring surface using a damp sponge or cloth. Allow the adhesive or mortar to cure according to the manufacturer’s recommended time before walking on or using the floor.